Viewing Reports
TallyPrime Features for Viewing Reports
You can use multiple ways to view reports in Tally Prime. You can view all the reports in Tally Prime using the options in Gateway of Tally. Alternatively, you can find any report using Alt+G (Go To).
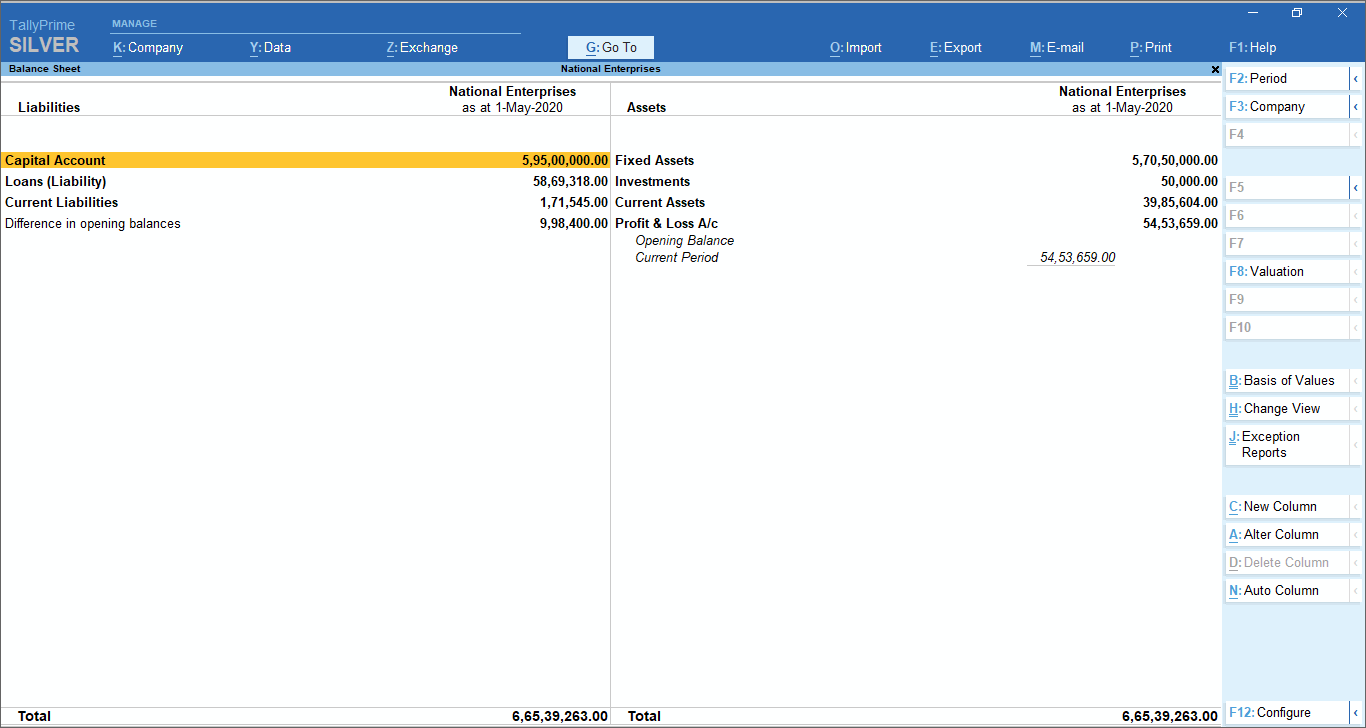
The most frequently used reports like Day Book, Balance Sheet, Profit & Loss A/c, Stock Summary, and Ratio Analysis are listed in Gateway of Tally. Use Display More Reports to see all other reports. When you select Display More Reports you can see a list of reports grouped under Accounting, Inventory, Statutory, and Exception. You can choose any of these and view the report or get to the next level of report listing. Notice that even in Gateway of Tally menu pressing Esc takes you to the immediate previous level.
To open Balance Sheet,
1. Go to Gateway of Tally > Balance Sheet or use Alt+G (Go To) > Balance Sheet.
2. Explore the Balance Sheet, by drilling down.
a. Notice that the Capital Account is selected when the report is opened.
b. Press Enter to view further details of Capital Account – Group Summary.
c. Notice that the first Group in the report is selected. Use Down and Up arrow keys to move to other Groups.
d. Press Enter to view the details of the Group – Ledger Monthly Summary.
e. Select any month and press Enter.
f. You can continue to drill down till the vouchers.
3. Press Esc to move up one level at a time.
In a similar way, you can open any other report and explore.
Condensed/Detailed View
Apart from the facility to drill down to the voucher level, there are other Tally Prime features offered in the reports. You can press Alt+F5 for a detailed view/to explode all the lines in a report to show further details in the same report.
Further details depend on the report that you have opened. For example, if you are in the Day Book, then the initial view shows the list of transactions based on the type of transaction. The detailed view shows the counterpart ledgers against which each transaction is recorded. In case you are viewing the Profit & Loss A/c, the detailed view shows the items that rolled up to the final value in the report.
If you want to see all details of a particular transaction, then select the line and press Shift+Enter. All the details of the transaction will be shown. Alternatively, you can use right-click to explode. You can roll up the details by pressing Shift+Enter or right-click again.
1. Open Balance Sheet.
2. View details of all lines.
a. Press Alt+F5.
b. Notice that every line in the report explodes to show further details.c. Use Down and Up arrow keys to move to other Groups in the same column.
d. Use Right and Left arrow keys to move to the right and left columns.
e. Press Alt+F5 again to collapse the details.
3. View details of a specific line.
a. Select a line in the report.
b. Press Shift+Enter.
c. Notice that the selected line in the report explodes to show further details.
d. Use Down and Up arrow keys to move to other lines.
e. Select the line you exploded, and press Shift+Enter to collapse the line.
In a similar way, you can open any other report and view details.
Filter data
You can view all the records in a report or decide to focus on selected records. In order to do this, you can apply a condition to filter records. For example, you can view only Payment vouchers in Day Book.
1. Open Day Book.
2. Press F4.
3. Select Payment.
All the Payment vouchers recorded on the day will be shown.
Find data in reports
You can find transactions that have some specified values. For example, you want to find the transactions that has items from the Batch DR-75-19-20.
1. Open Day Book.
2. Press Alt+F12.
3. Select Voucher in the Type of Information.
4. Select Batch Name in the Particulars.
5. Now select equal to in the Range of Information.
6.Type DR-75-19-20 in the field.
7. Select End of List in Condition.
The Day Book gets filtered to show all vouchers that have items from the Batch DR-75-19-20.
Tip: In TallyPrime, options to interact with the reports remain the same.
Enter – To drill down to the next level of details for the selected line. In all reports, you can drill down to any of the source vouchers.
Alt+F5 – To explode all lines in the report at one shot, on the same screen.
Shift+Enter – To explode a selected line of the report on the same screen.
Esc – To move up by one level.
Print, E-mail, Fax, and Export Reports
Once a report is open, you can print, e-mail, fax, or export the report. You can do these for multiple reports at a time, without opening reports. You can export the reports in different formats – ASCII (Comma Delimited), Excel (Spreadsheet), HTML (Web-Publishing), JPEG (Image), PDF (Read-only document), or XML (Data Interchange). Export can be done for the currently open report, or different reports at a time. You can also choose to export a group of reports at a time – All Ledger Accounts, One Ledger Account, Group of Accounts, Sales Vouchers, Day Book, Multi-Voucher, Bills Receivables, or Bills Payable.
Print Current Report
1. Open any report.
2. Press Ctrl+P.
3. Press C to configure the details for printing.
4. Now press I to preview the invoice.
5. Press P to print.
The report will be printed on the printer you have configured.
Print Other Reports
1. Press Alt+P > Others.
2. Select the report you want to print.
3. Press C to configure the details for printing.
4. Press I to preview the invoice.
5. Finally, press P to print.
The selected report will be printed on the printer you have configured.
